Home Page › Info › Advice › Rockery Stone › Positioning Larger Rockery stones
Positioning Larger Rockery stones
Once you’ve got your stone and know exactly where the rockery is going to go, you can commence work. You need to familiarise yourself with the shapes of the stones you have purchased. One fatal error is to go along choosing all the easy shapes to lay, to find you are left with only awkward shapes which are very hard to position to get them to look right with the rest of the perfectly laid rockery. You need to look at the shapes available to you and try to use the awkward shapes as you go along.
Always start from one point. If you start from both ends of the rockery, it is very hard to get the right sized stones to fit in the middle, whereas your finish point can have a slightly larger or smaller gap and no one will ever notice.
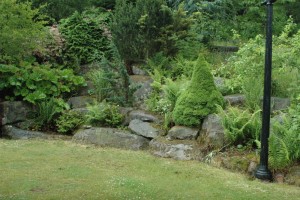
Preparation is the key part of any landscaping project and building a rockery is no exception. To me Rockeries look best when they are laid in an organised manner, so it is important you get the levels right. Start by working out where you want the base of the rockery to lie. It’s a good idea to have the base of the rockery approximately six inches or more below the level of the lawn, patio or area in front of the rockery.
This gives a much more professional and natural look rather than having the lower stones bedded above the lawn or patio.
So start by digging a trench for the stones about 6 inches deep and as wide as the stones you are going to be using. Don’t discard any of the materials you have dug out as you will need this material to back fill behind the rocks and to help position the stones. Once the trench is dug have a look at how tall you want the first level of the rockery to be.
Find a suitable sized stone to fill this space; you need the majority of the weight to sit at the back of the stone so that it leans back into the rockery rather than being unstable and falling forwards. Its stability can be increased by putting an inline in the trench so that the stone would fall backwards into the bank if it had a choice. The trench needs to be free from large stones and with a relatively level surface, or a rough surface that is the mirror image of the side of the stone that will be placed upon it. Clay is ideal for bedding as you can loosen it and once the stone is placed it will compact to suit the shape of the stone. If using a mini digger the stone can be pushed into place with the blade and then it can be adjusted to the right angle by using the bucket or again running into it with the blade. Once the stone is in place back fill behind the stone with any excess materials from the trench. Avoid back filling with any material that could decompose like tree roots, as in later years this could result in the stones moving.
Decide which is to be your next stone, then measure the side you want to face outwards. If it is shorter than the first, simply fill in your trench to get the top to the same height or vice versa if the stone is larger then dig your trench a bit deeper to compensate. I Feel the rockeries always look better the tighter you get the stones, although having said this once they have been planted if you do have a few larger gaps, no one will notice, the soil and plants are a bit like tile adhesive, it hides all the mistakes! And I can promise you the little floors in stone placing will only be noticed by you, as you’re the person who knew it was a little out of line when placed it. So now you can follow this procedure for the remaining first shelf of the rockery, but remember to think logically about which stones you are using. If one looks like its going to be much better for the next step up on your rockery then make the effort to save it for such a position.
Once your initial stones are in place you can start on the next shelf. Hopefully you will have used all the largest looking stones in the bottom, making it easier for you to position these ones, as now there not at ground level you have less room for maneuvering them.
Selecting your Rockery stone sizes
Free Shipping!
Free Shipping to the Mainland UK